


How To Create Own Social Network Site Like Facebook
Hello Everyone, Today i'm talking about how to create your own social networking site like facebook. In these days, number of social networking sites are increasing day by day , but it doesn't stop people from creating another one. I found a way that helps you create your own social networking site like facebook. There is always a requirement for creating a niche based social networking site. For example, if you have a college, you can create a social networking site, which is solely for your college members and students. Or you can create a community driven social networking sites for your locality, interest or anything which help users to connect with each other. Today, I'll be talking about PHPFOX which offers you the quickest way to create a Social networking site of your own, and you can easily manage it too.
How To Create Own Social Network Site like Facebook:

Details and overview of PHPFOX Script:
"PHPFox" is a great social networking script, built in PHP & MySQL. Phpfox is very easy to use, you don’t need to do any coding and other complicated stuffs like that, just install this script in your webserver/web host and you're ready to go:- See the User demo of this script here :- http://demo.phpfox.com
- To view the Admin Panel demo, visit here :- http://www.phpfox.com/admin-demo/
- To view the mobile version, visit here :- http://demo.phpfox.com/mobile/
Features of PHPFOX Script:
This Phpfox Social Script has got lots of features,- Easy to use Administration Panel
- Ability to run advertisements & earn lots of money
- Ability to easily integrate with CDN (Content Delivery Network) to boost the speed of your website
- Server Load Balancing
- Mobile Website (webpages for mobile with smaller screens)
- AJAX Browsing & Search
- Ability to Install new apps/games
- Easy to use CMS (Content Management System) & Theme Manager
- Multilingua l(You can Install many additional language packages)
- Marketplace, very similar to ebay. Where users can list their items
- Account Privacy (very similar to facebook eg; blocking, privacy level, etc)
- Timeline, very similar to facebook
- Ability to add/create blogs, photos, forums, videos, music, polls, quizzes, events, etc
- Additional Third Party features, that you can add later- video chat, radio, TV, Arcade flash games, user map, advanced marketplace, advanced photo library, documents, etc
ScreenShots:
1. Home View: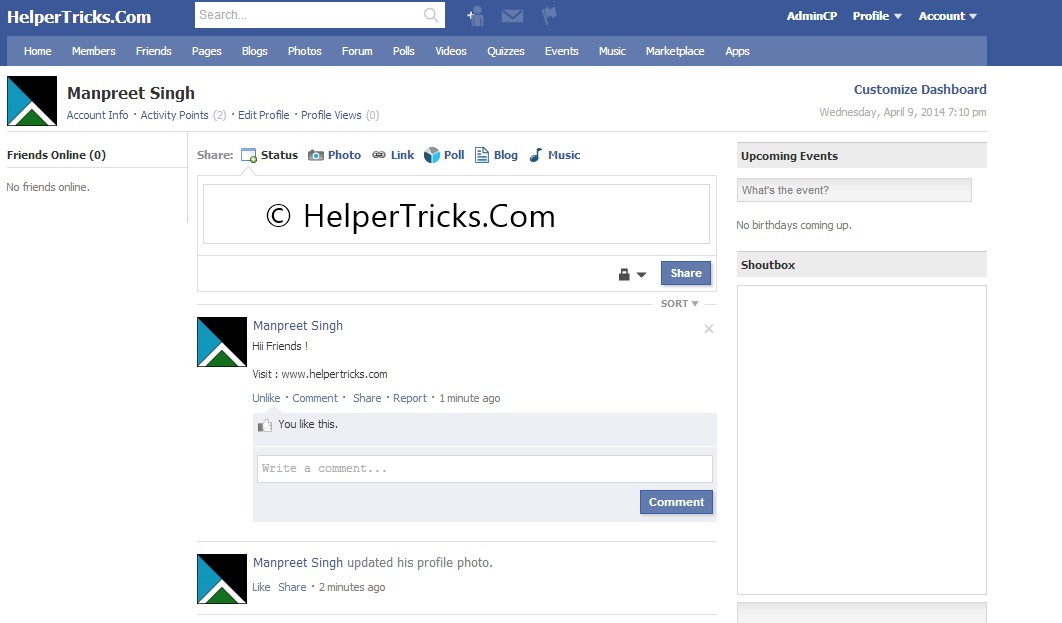
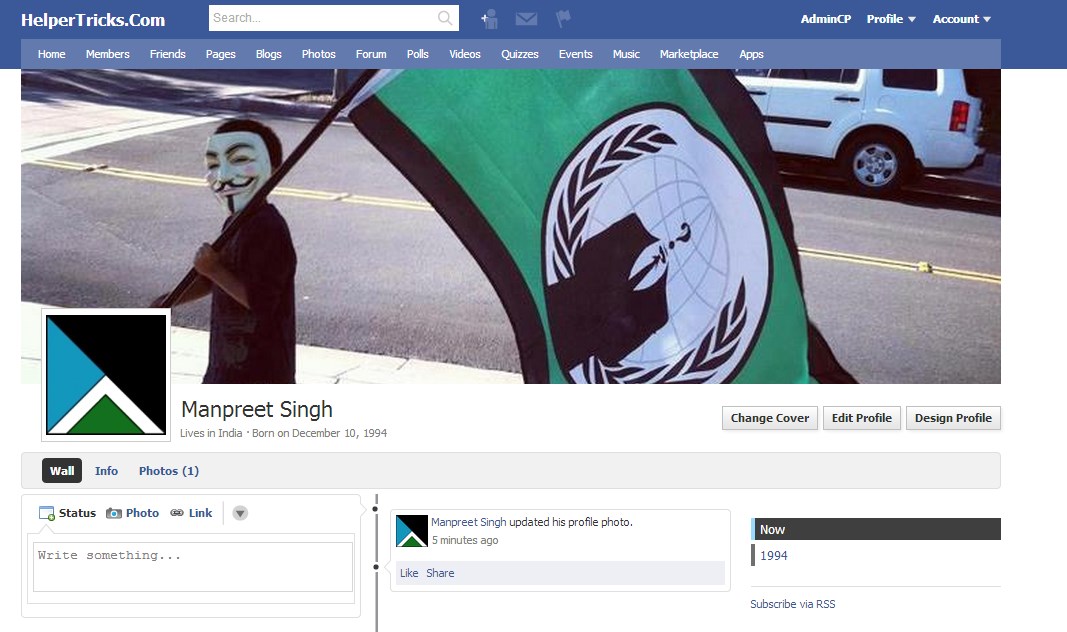
2. Timeline View:
Webhosting Requirement for using PHPFOX Script:
These are the basic requirements for running this script- Apache or NGINX Web-server
- PHP 5.1 or later
- MySQL 4.1 or later
How To Install PhpFox Script on Your Hosting/web server:
Installation of PHPFOX script is straight-forward, and here is how you can get it done:Step 1 ) Download the PHPFOX package from here (Download phpfox3.7.6 Free for education purpose only: Link) or (Buy the script from official phpfox site: Link) and upload the script to your server's home directory via FTP or upload direct .zip file into file manager then extract it then move all files upload/ folder into public_html/.
Step 2 ) Just type the URL in any web-browser-
http://yourwebsite.com/install , then it will take you to the installation page.
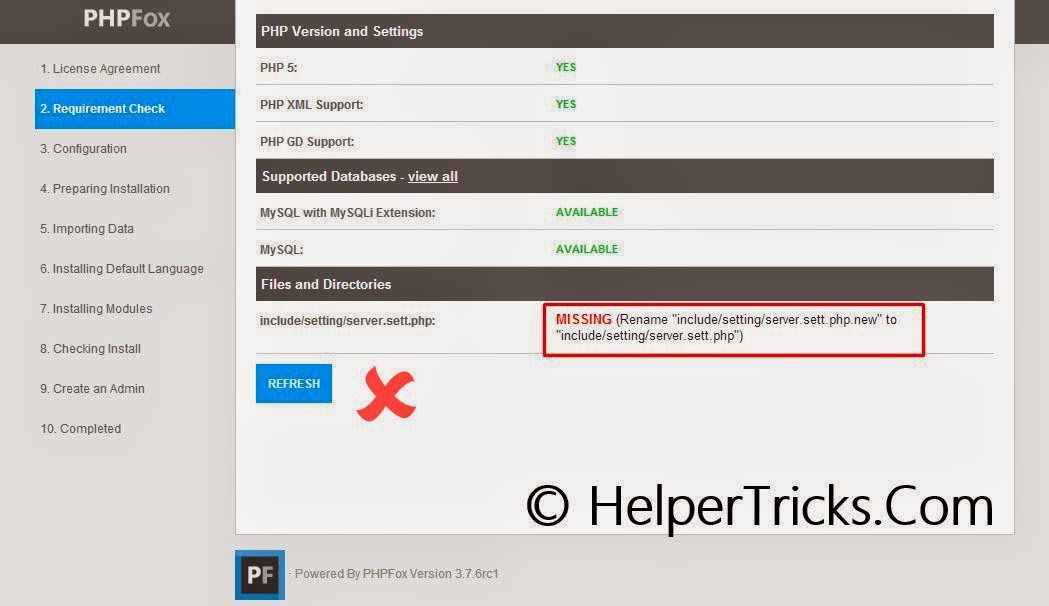
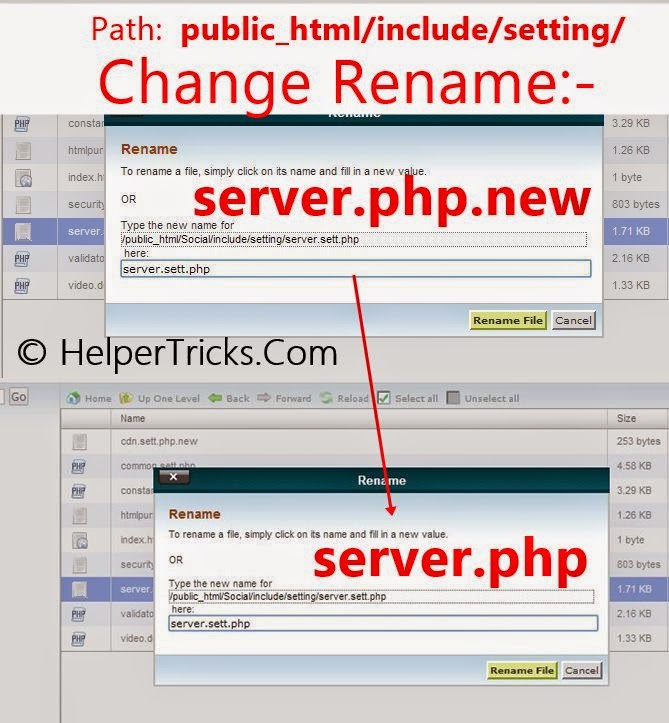
Step 3 ) Now go to the file manager change the rename:
Path : public_html/include/setting/
- server.php.new to server.php
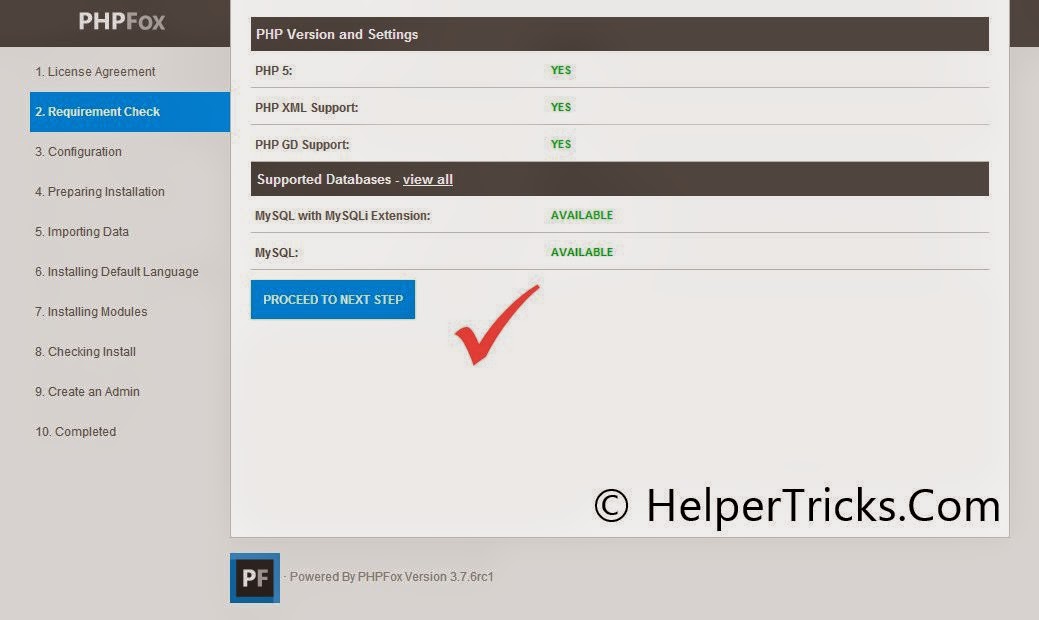
Step 4 ) Now save the rename, after make changes, go again http://yourwebsite.com/install , then it will take you to the installation page then click "Proceed to next step".
Step 5 ) Next, you’ll be granted to provide the database Configuration. enter the details and click "Proceed to next step".

Now its time to Create MySQL Database:
A ) Login your hosting cPanel/Admin panel, then select MySQL Databases.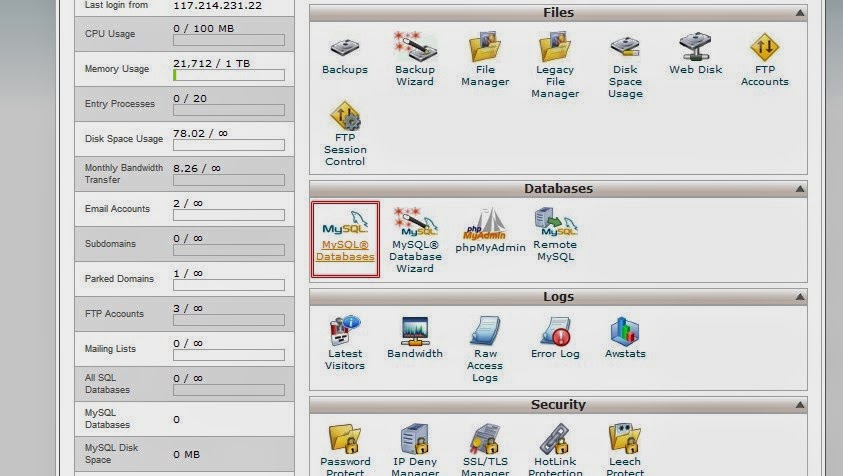
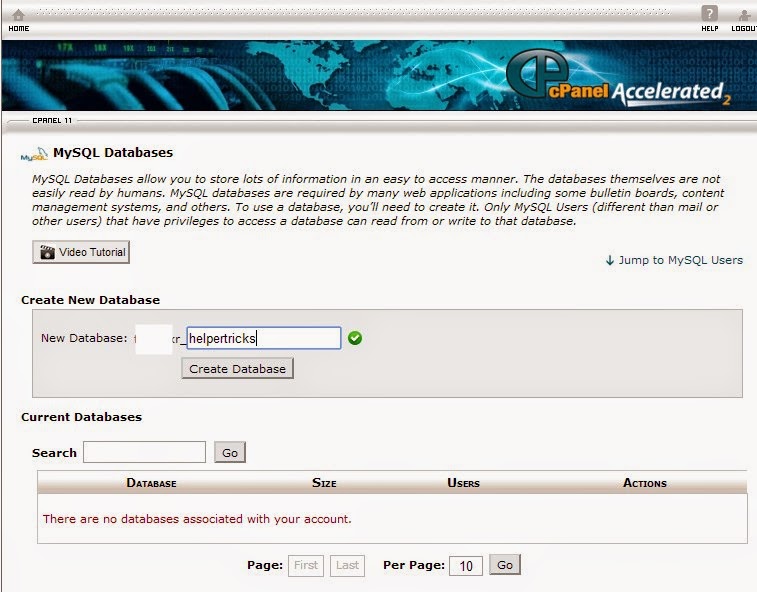
B ) Enter any name of database then click on Create.
C ) After Create "MySQL Database", now create one "MySQL User".
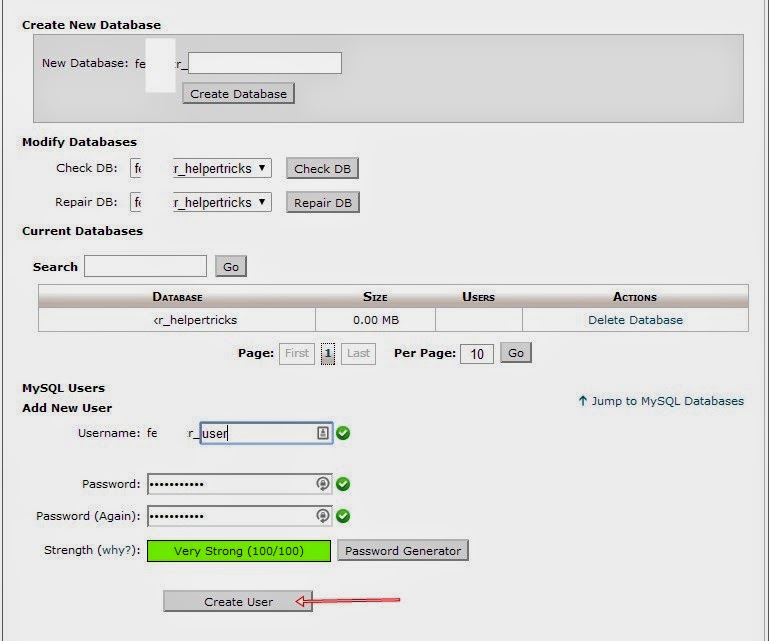
D ) Now add "MySQL User" Into Your "MySQL DataBase".
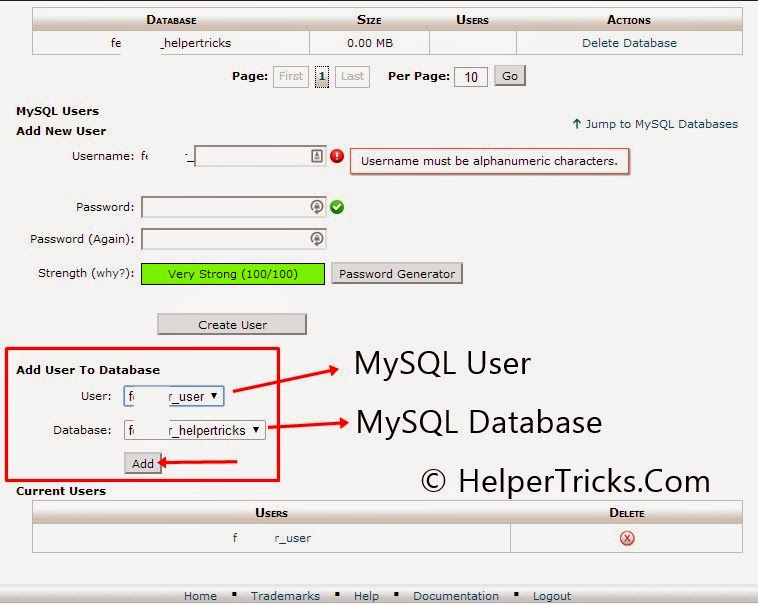
E ) Click on "Add".
F ) After click on "Add" button, then select "ALL PRIVILEGES".
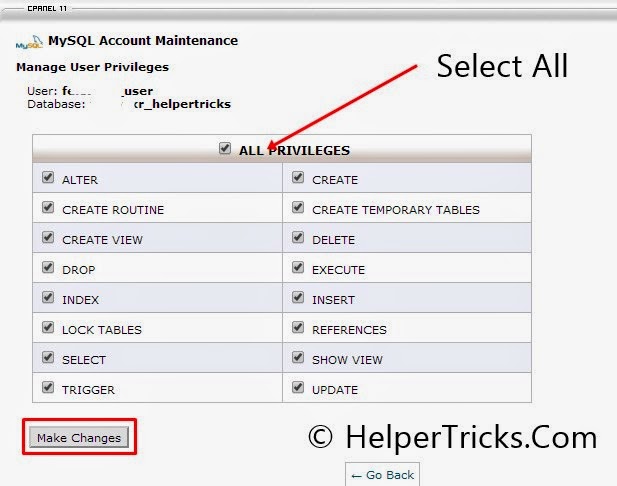
Now your Database is Ready for Installation of PhpFox,
Now, continue from Step 6,
Step 6 ) Now Enter your's Database details,
Database Driver : MySQL
Database Host : localhost (for your own hosting) or (if you runnig this script on free any free hosting, then your's hosting provide the host name)
Database Name : MySQL Database Name
Database User Name : MySQL User Name
Database Password : MySQL User Password

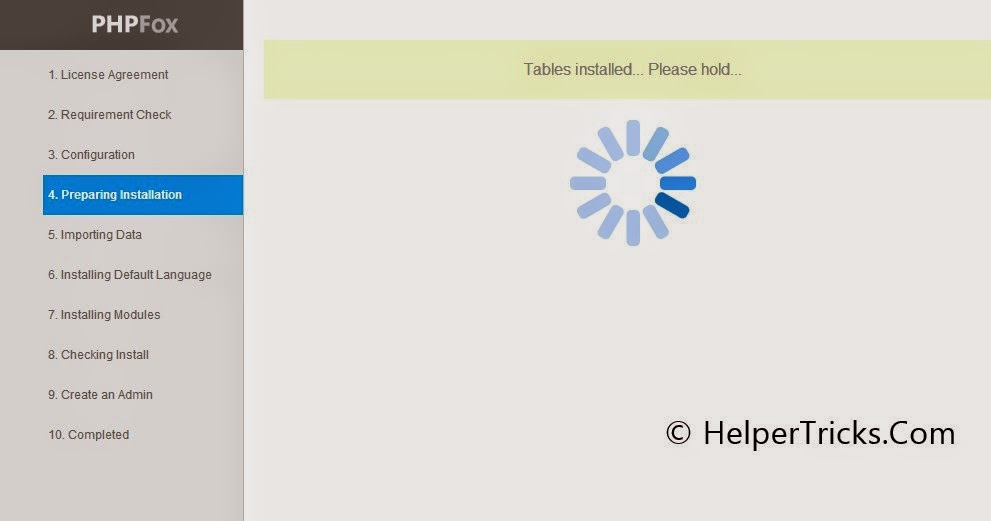
Step 7 ) Then click on Start The Install.
The installation will be in progress,
Step 8 ) After the installation is completed, Enter your's Admin's Profile Details.
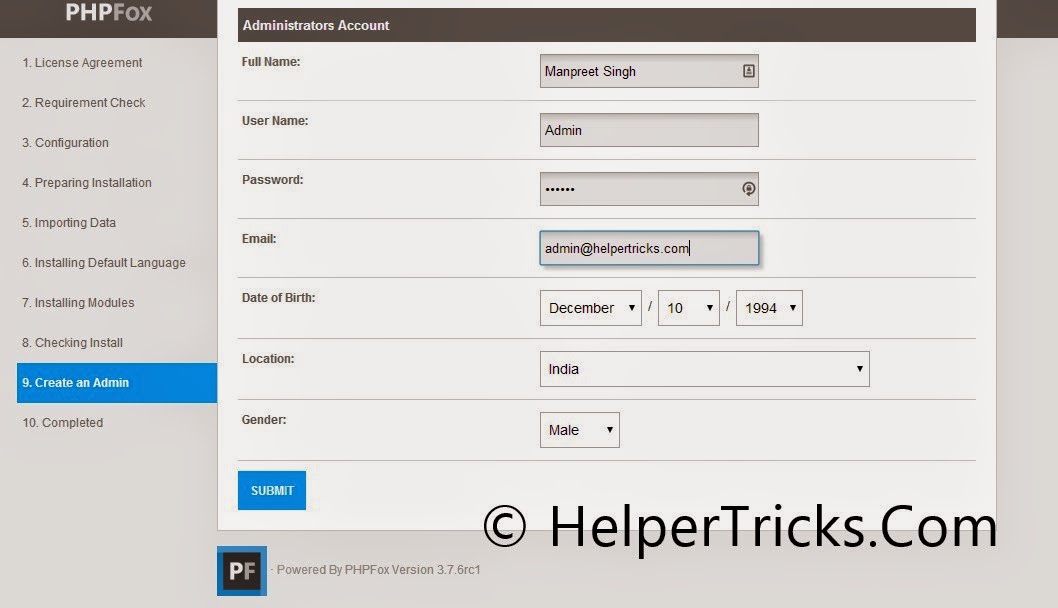
Step 9 ) Click on Submit.
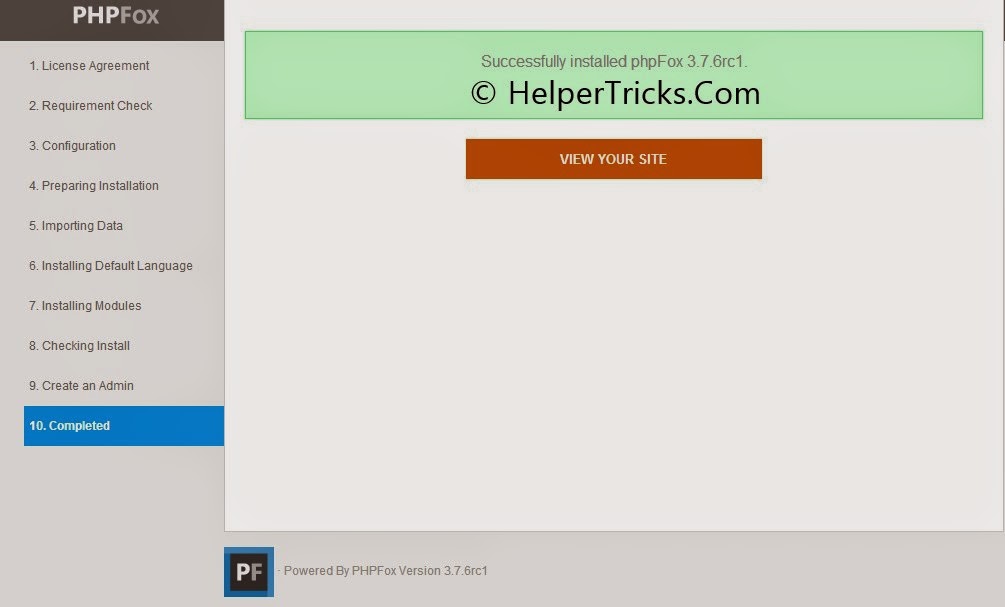
Step 10 ) Click on Visit Your Site.
Now your Own Social Networking Site is Ready. Now, you can start working on customization and branding of newly created social networking site.


ReplyDeleteHello everyone, i would like to share my experience with you all, I lost over 100 thousand dollars to all these fake so called BO merchants , after several attempts in trying to recover my money all efforts failed, i was looking through the page of the internet then i saw cybergoldenhacker they were recommended as a good and reputable company so i reach out to them, to my surprise i was able to to recover all my funds
contact: cybergoldenhacker at gmail dot com
Do you need to increase your credit score?
ReplyDeleteDo you intend to upgrade your school grade?
Do you want to hack your cheating spouse Email, whatsapp, Facebook, instagram or any social network?
Do you need any information concerning any database.
Do you need to retrieve deleted files?
Do you need to clear your criminal records or DMV?
Do you want to remove any site or link from any blog?
you should contact this hacker, he is reliable and good at the hack jobs..
contact : cybergoldenhacker at gmail dot com
Your new business site is sale SSL in a PCI compliant environment, you've just signed up with a reliable merchant provider, and you have a secure shopping cart - surely there's nothing else you need, right? Wrong! While online security protocol may seem redundant, each measure has its purpose, and one you don't want to forget is the acquisition of an SSL certificate.
ReplyDelete